
If you make yourself any swim wear, you will almost certainly have enough left-over fabric to sew a swim cap. I only wear swim caps made out of stretchy swim suit fabric. They do not keep my hair dry, but I have not been able to get my long hair up under the silicone or rubber types without great discomfort. The swimwear fabric caps are more comfortable to put on AND to have on. I need to wear them to keep my hair from getting horribly tangled in my goggle straps. I even wear them under the triathlon caps that are required at races.
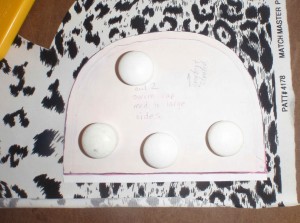
I used one of the swim caps I have been wearing to help make a pattern. The original cap is still in good shape, so hasn’t lost it’s own elasticity yet. I had to fold the center band under one of the sides to be able to get a tracing of the curve of the side pieces. My sewing weights were useful to hold the cap down, so that I could work around the lumps of the fabric underneath.
To get a more accurate measurement of the length of the curve, I placed a piece of string over it, then measured the string. Measuring the circumference of the opening of the cap was easy enough, but I did measure the pieces separately. I needed to do this to be able to draw each piece. The length of the center band was the same as the length of the curve. I added 1/4 inch to what I measured as it’s width. I added 1/4 inch seam allowances to everything, but should have added 3/8 to 1/2 inch around the bottom, because sewing the elastic on takes up about that much.
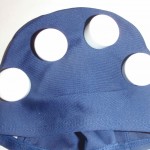
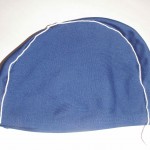
The center band is just a rectangle, so the only challenge was to draw perpendicular lines of the correct proportions. For the swim cap pattern (click here to get a printable version of the pattern I used), I folded that rectangle in half so that it would be short enough for the page. Don’t forget to cut it on a fold, so the band will be long enough!
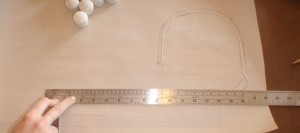
After I cut the paper pattern out, there wasn’t enough black line left showing for my scanner to recognize the image, so I had to go around the lines with another marker, and I chose pink that time. I didn’t think about marking how the pieces should be placed relative to the stretch of the fabric until after I scanned everything, but you can see that on the side panel photo and I will explain it more. When the pdf for the swim-cap-pattern is opened it looks larger than it is. Make sure you print it at only 100%. I went through the process of printing it out and making my swim cap from the online pattern.
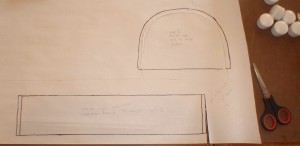
Determining which way the fabric stretches the most was the next step. On the original swim cap the greatest stretch was from top to bottom on the side panel. The band stretched the most from back to front. I laid out my pattern pieces accordingly.
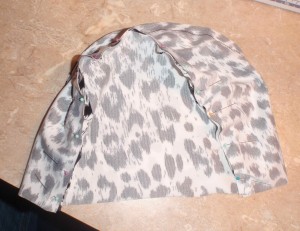
Pinning the side panels to the center band is best done one side at a time. I found it useful to pin the ends of the center band in place first, then find the center of both pieces and pin them together. A slight stretch was all that was needed to pin the rest of it in place. I sewed it together first with a narrow zig zag, so that I could try it on. When I was satisfied that it fit, I reinforced the seams with the serger seam.
I measured some 3/8 inch wide, soft, knit elastic to the circumference of the original cap, then added 1/2 inch to allow 1/4 inch overlap of each end. That ended up being 18 inches of elastic. I zig-zagged the ends together flat. Then, I divided the elastic into quarters, marking the points with pins. I guess since I measured the circumference this second time as one measurement, it turned out a bit shorter than the fabric of the cap. This is okay, since I wanted a little tension to keep it on.
I then divided the cap opening into quarters and pinned the elastic at these points. I stretched the elastic to pin it in a few more places, then sewed it to the edge of the cap using a medium zig-zag, stretching to make it fit. Next, I folded that under and sewed with another, narrower zig-zag stitch to hem it.
The cap seems to have ended up just a bit smaller than the original. I would call it a small adult or large child size, although I think it will stay on fine, especially with goggles over it. Still, when I make another, I will add about an inch extra to the bottom of the cap. That means I will need to add an inch to each side straight edge, plus an inch to each end of the center band. The whole project only took a couple of hours, so I might even make another one tomorrow!
