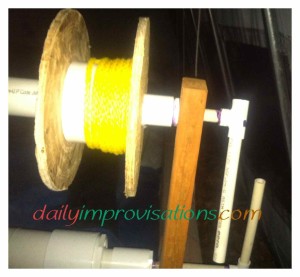
I can finally get my pool cover closed while standing in one convenient location. Until the DYI retractable hand crank for opening it was in place, I had to walk back and forth from sides of the pool or get help to open and close it. After the opening system was made, I could close it by pulling it while in the pool or by pulling the ropes at the ends carefully. Now, I can do it all quickly and by myself. PVC pipe was again the main component of the system, with a bit of wood, a metal bearing, and a screw.
The main design ideas were:
- Make the spool for the rope large enough that it didn’t take too many turns to wind the rope. (The circumference of a circle is roughly 3 times the diameter, so while a 2 inch pipe would take up 6 inches of rope per turn, a 4 inch pipe would gather 12 inches per turn, thus getting the job done twice as fast.)
- Enough layers of PVC pipe across the expanse to maintain rigidity.
- PVC pipe in place for the handle to fit the $6 ½ inch metal bearings that we already owned.
- Use as many scraps of things already on hand in the workshop.
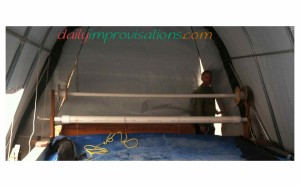
It is probably helpful to take a look at the finished set-up before going into how it was all connected. The rope isn’t on it yet, but that makes it easier to see the PVC and wood parts. The ends of the completed pipe system are set into metal bearings that have been placed in a fitted hole cut into some pressure treated lumber, the said lumber being bolted to the cement box that the swimming pool sits inside of. (To learn more about securing bolts in cement, click here to read near the end of another article about the swimming pool, and see the video below that) (click on any photo to enlarge)
The ends of the of ½ inch diameter (the diameter referring to the inside space) PVC pipe had to be softened in order to squeeze it into the not quite ½ inch metal bearing. This softening was accomplished by modifying the electric element from an oven. I will write about how that was made in a future blog post. So, let’s go back to the beginning of putting the pool cover closing system together.
Four circles of OSB wood (also known as wafer board) were cut using a router with circle cutting jig, secured to a pivot point. The inner hole of the wood was the most important because a certain size of PVC connector or pipe needed to fit snuggly inside. The outer circumference only need to be wide enough to keep the rope in place.
A coupler that would fit with a 4 inch section of PVC pipe was inserted into the inner hole of the first circle of wood, that is the circle closer to the middle of the whole PVC set-up. This 4 inch piece was the design for the spool that would limit the number of turns required to wind up the rope when the pool cover was being closed. The second circle of wood had a smaller hole cut in the center because this helped to stabilize it on the 1¼ inch PVC pipe that extended out of the 2 inch PVC pipe that formed the outermost pipe of the expanse of PVC pipes across the top of the pool.
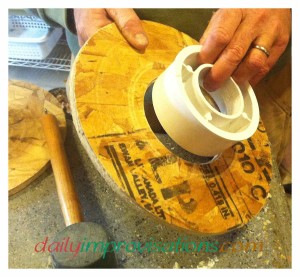
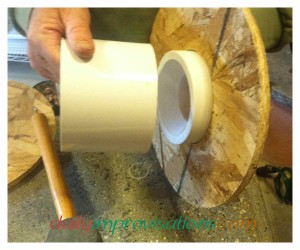
I’ll back up a little, as much for myself as for you. The inner circle of wood was slipped over a length of 2 inch PVC pipe. Then, a length of 1¼ inch PVC pipe was put inside of that, with just enough more length to get past the larger spool sections.
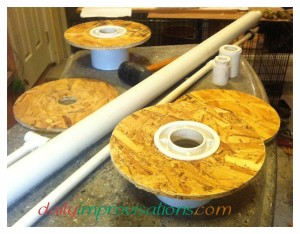
Now, a PVC connector is glued onto the end of the 1¼ inch PVC so that the most inner ½ inch diameter PVC pipe would be supported in place. However, this inner ½ inch PVC pipe is actually two lengths of pipe that are held together in the middle of the expanse with a coupler. This had to be since the pipe only comes in 10 feet pieces and this piece needed to be longer. Having it in two pieces also made attaching all the pieces at the end much easier.
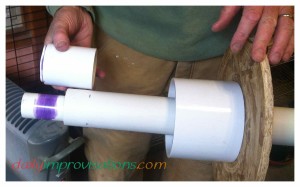
The first length of ½ inch PVC to be inserted into the middle of everything else had the coupler attached to the inside end of it. The outer end had the outer wood circle, with the ½ inch coupler inside. However, the ½ inch coupler turned out to not be ½ inch after all (was it in the wrong bin or did the label get read wrong?), so a small sleeve to deal with a wrong sized coupler. The metal bearing was also manipulated onto the end, as mentioned above.
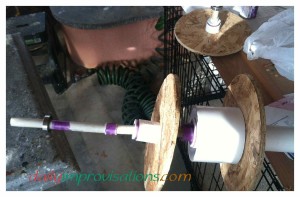
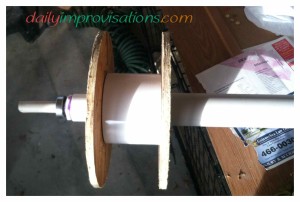
All of these things were glued in place and the whole end was condensed to hold the 4 inch spool in place. Then the operation was repeated on the other end, including making sure the inner end of this second section of ½ inch PVC pipe was inserted into the coupler on the end of the other section.
Each metal bearing was now guided into the holes in the piece of lumber that will support it all at a functional height. On one end, a 3-way PVC connector (specifically called a “T” connector) was attached to the ½ inch PVC pipe to glue in a handle-sized piece of PVC.
The rope, still threaded through the pulley bolted to the end of the cement box, was cut to a length that would not leave extra rope to tangle things up. It was screwed to the 4 inch spool in 3 different places. The only little trick to getting it started is to lift the corner of the cover so that the end of the cover clears the handle on the Fastlane generator. It is still new enough, that it is almost disappointing that the fun of turning it closed is over so fast! (To read more about swimming with the Fastlane current generator click here.)
